You will receive an eSIM QR code by email (to the address you entered at checkout). Note: It may take a few minutes after purchase to receive the email.
You need Wi-Fi connection for installation.
We recommend
Install the eSIM the day before your trip.
Activate it at your destination by selecting our eSIM for "Mobile Data" in your phone settings.
What You Need
An iPhone that supports eSIM
The QR code sent to your email
Installation (QR Code Method)
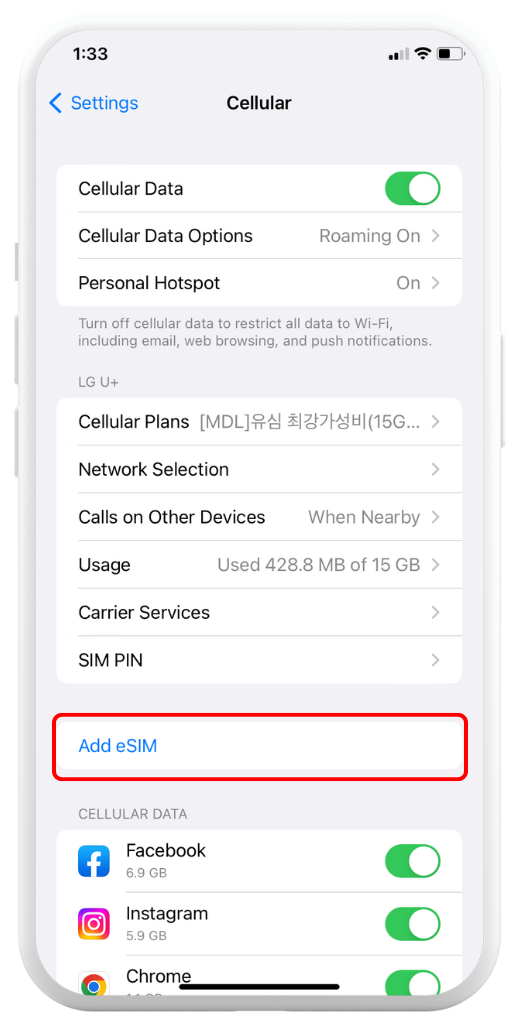
Go to Settings > Mobile Service/Cellular and tap Add eSIM
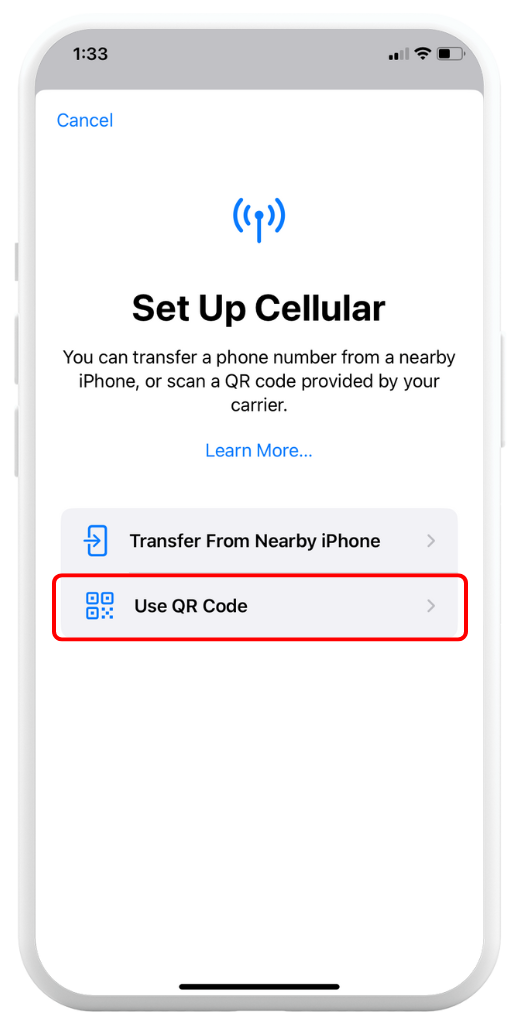
Tap Use a QR Code
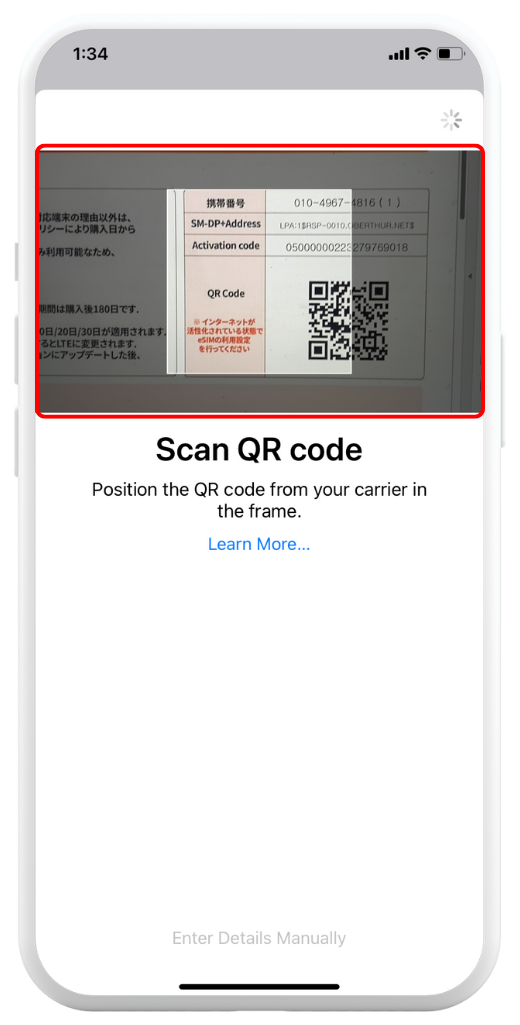
Scan the QR code received by email, or enter details manually if scanning is not possible
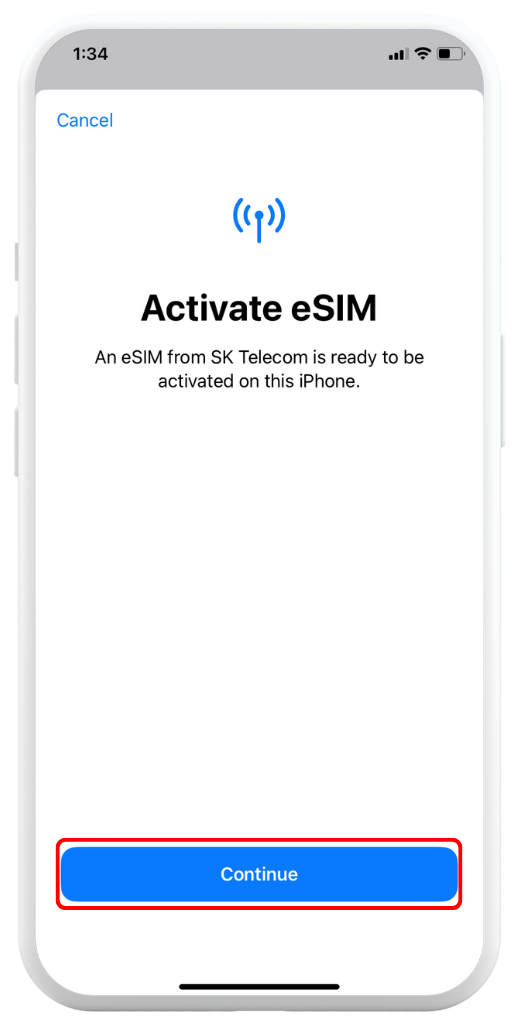
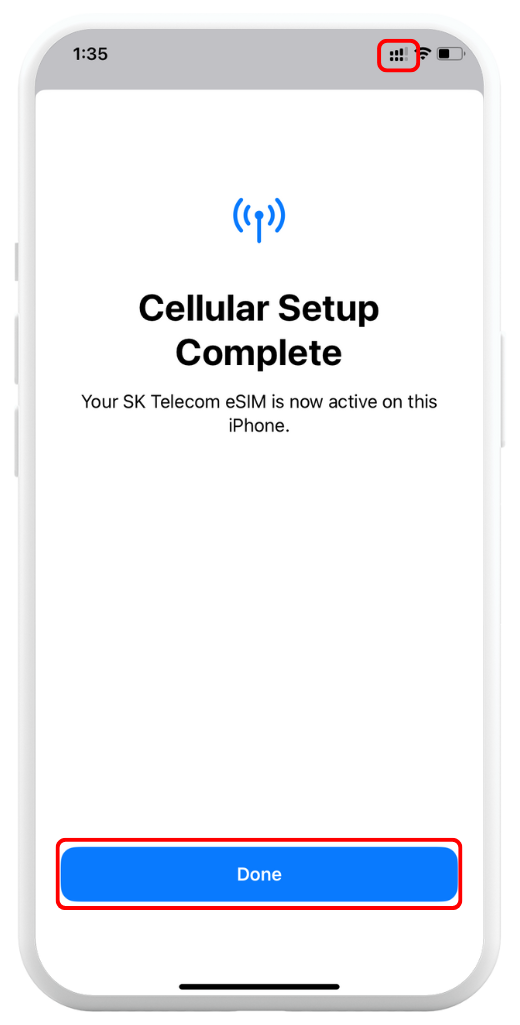
After scanning the QR code, tap Continue to activate
Wait until activation is complete (check for 2 signal bars at the top)
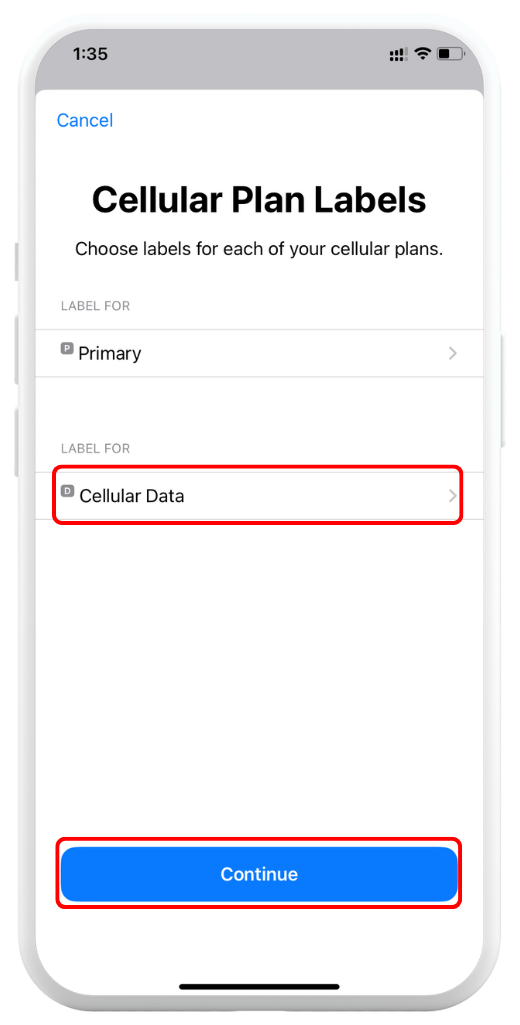
Tap the new eSIM installed to rename it
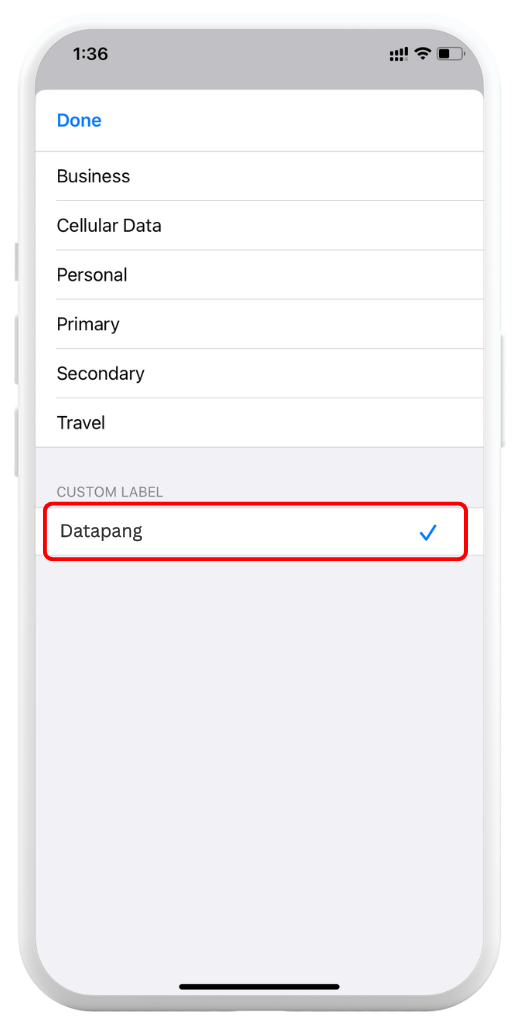
Rename it to Datapang
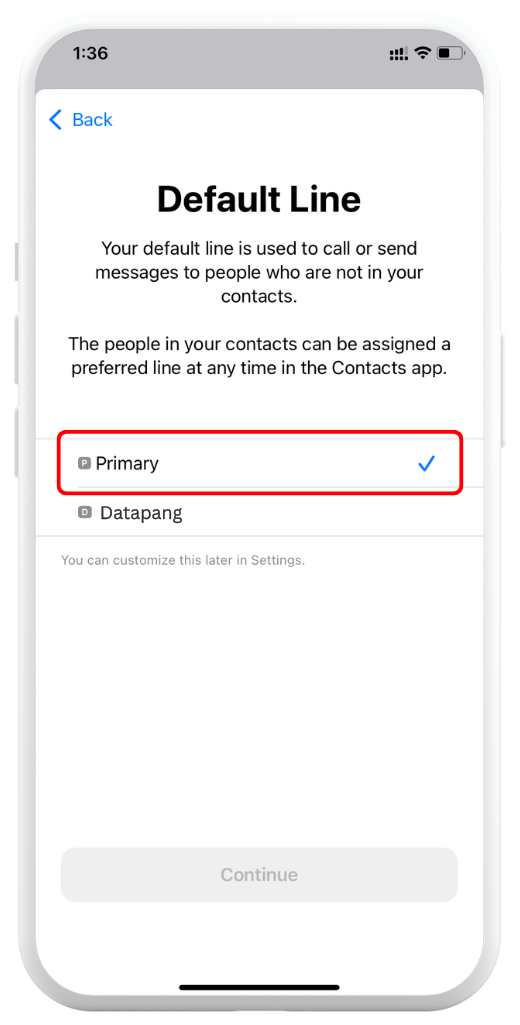
Set your Primary SIM as Default Line
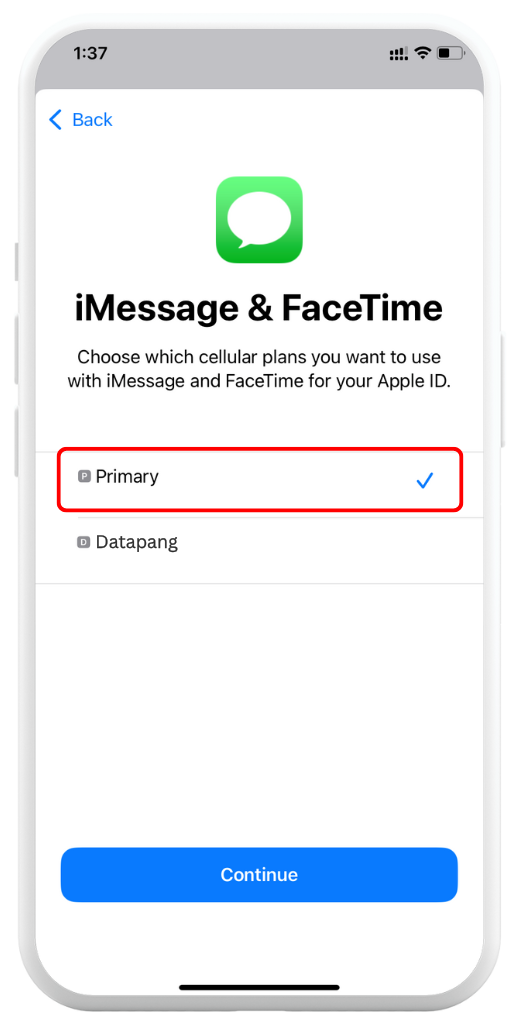
Set your Primary SIM for iMessage & FaceTime
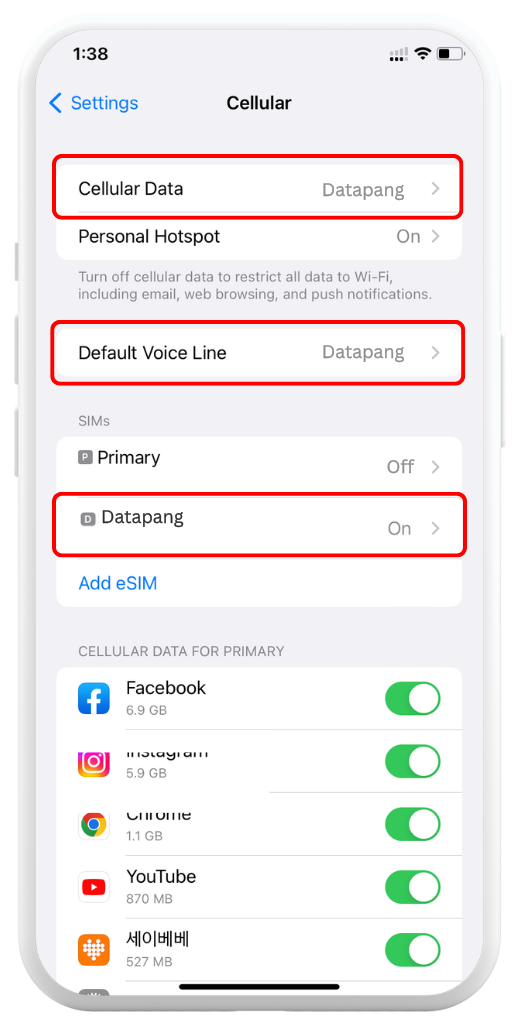
Go to Settings > Mobile Service/Cellular and make sure Cellular Data is set to Datapang
Done! Your eSIM is ready.
Important: If you are not yet in your destination country, set Cellular Data to your Primary SIM (Step 9). Switch to Datapang only after arrival.
①
Go to Settings > Mobile Service/Cellular and tap Add eSIM
②
Tap Use a QR Code
③
Scan the QR code received by email, or enter details manually if scanning is not possible
④
After scanning the QR code, tap Continue to activate
⑤
Wait until activation is complete (check for 2 signal bars at the top)
⑥
Tap the new eSIM installed to rename it
⑦
Rename it to Datapang
⑧
Set your Primary SIM as Default Line
⑨
Set your Primary SIM for iMessage & FaceTime
⑩
Go to Settings > Mobile Service/Cellular and make sure Cellular Data is set to Datapang
Manual Installation
Go to Settings > Cellular/Mobile Data > Add eSIM (or Set up Mobile Service)
Tap Use QR Code > Enter Details Manually
Enter the SM-DP+ Address and Activation Code (from your email) → Tap Next → Tap Continue twice
Wait for the network to connect → Tap Done
Rename "Datapang" as a label for your new eSIM
Set Primary as your Default Line → Tap Continue
Choose Primary for iMessage & FaceTime → Tap Continue
Select your new eSIM for Cellular/Mobile Data → Tap Continue
What You Need
An Android phone that supports eSIM
The QR code sent to your email
Installation (QR Code Method)
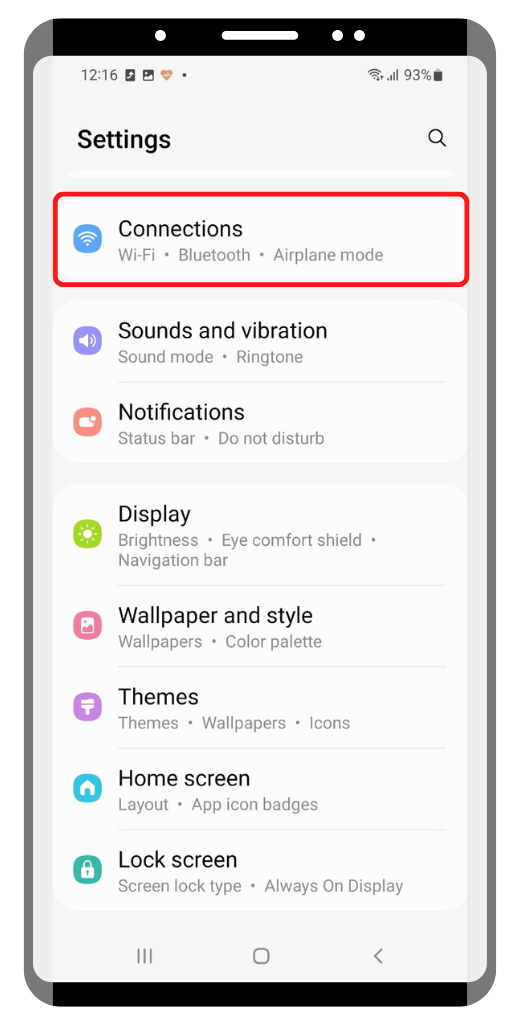
Go to Settings > Connection
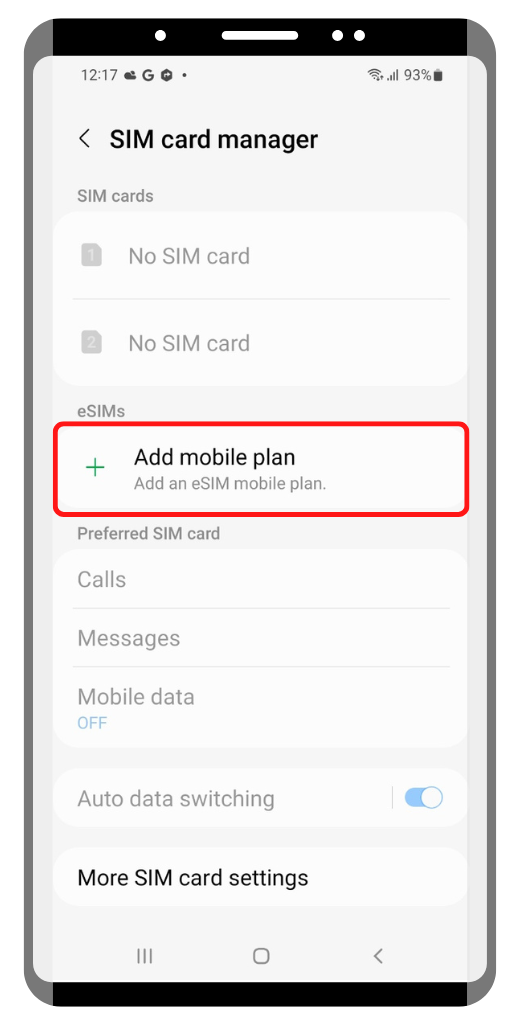
Tap on "SIM manager" > Tap "Add eSIM/Mobile plan"
Click "Scan carrier QR Code"
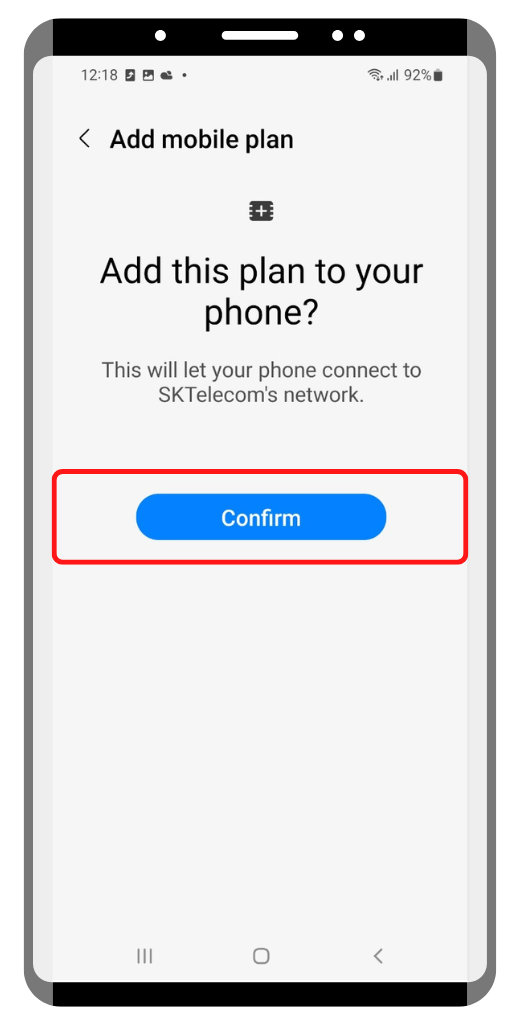
When the camera opens, scan the QR code. If you saved the QR code, you can open it from your gallery instead.
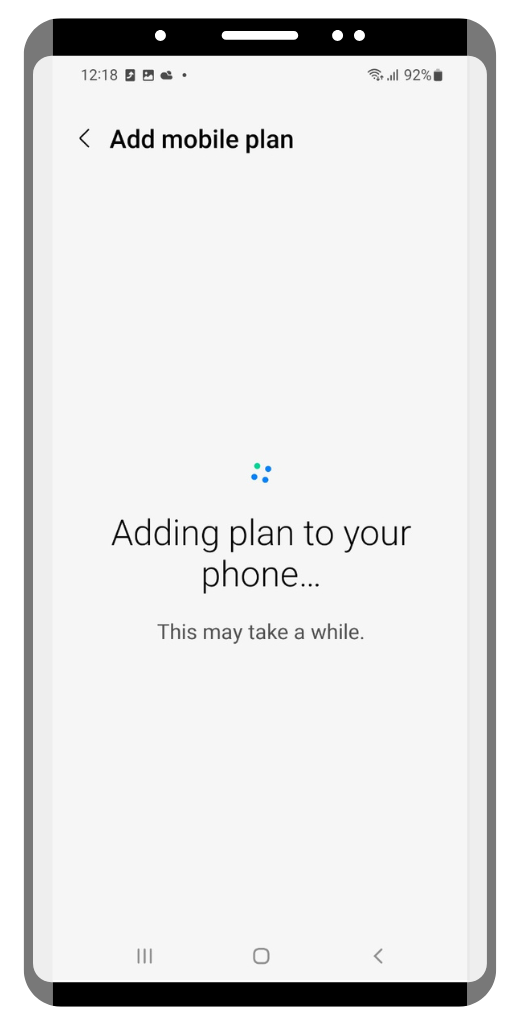
Tap Confirm to proceed. Installation may take 2–3 minutes depending on your phone.
Done! Your eSIM is ready.
Important: If you are not yet in your destination country, set Cellular Data to your Primary SIM. Switch to Datapang only after arrival.
①
Go to Settings > Connection
②
Tap on "SIM manager" > Tap "Add eSIM/Mobile plan"
③
Click "Scan carrier QR Code"
④
When the camera opens, scan the QR code. If you saved the QR code, you can open it from your gallery instead.
⑤
Tap Confirm to proceed. Installation may take 2–3 minutes depending on your phone.
Manual Installation
Go to Settings, tap Connections, then tap SIM card manager on your device.
Tap Add mobile plan, then tap Scan carrier QR code.
Tap Enter activation code.
Enter the SM-DP+ Address & Activation Code by copying it, tap Connect, then tap Confirm.